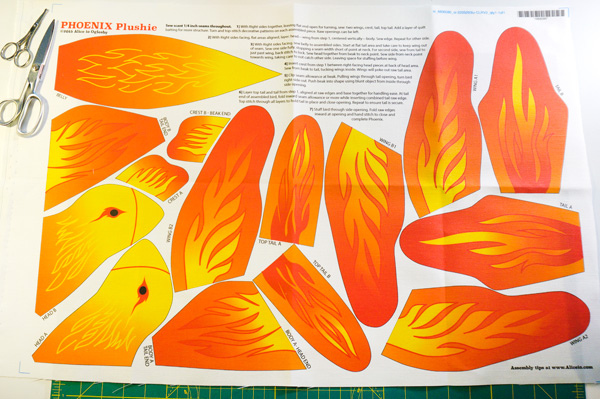
I love the creative community that Spoonflower fosters and their weekly design contests. Creating the Phoenix Plushie for their Mythical Creatures Plushie design contest was a particularly rewarding challenge as I had to brush off 3D pattern skills I hadn’t used in a while. I created the prototype using white canvas fabric and then translated the final pattern pieces to Illustrator for coloring and setting up to meet the Spoonflower printing specifications. After receiving my test print from Spoonflower, I was able to assemble the final Phoenix Plushie in all its full-color glory. I documented the assembly process and have provided tips below.
 First off, thanks for purchasing my Phoenix Plushie design from Spoonflower. (If you haven’t purchased yet, you can via my Spoonflower shop.) If you are a beginning sewer you may find that this pattern tests your skills, but if you are careful and patient I believe you can complete the project. More advanced sewers should have no problems with assembly.
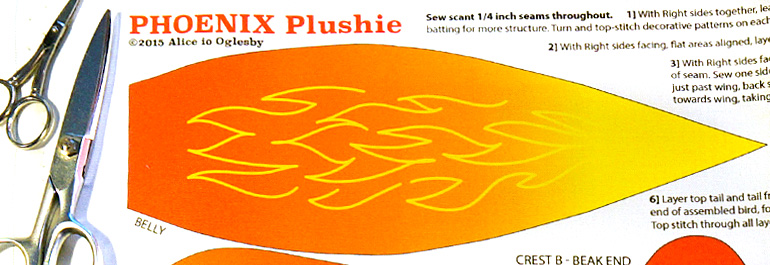
Sew scant 1/4 inch seams throughout.
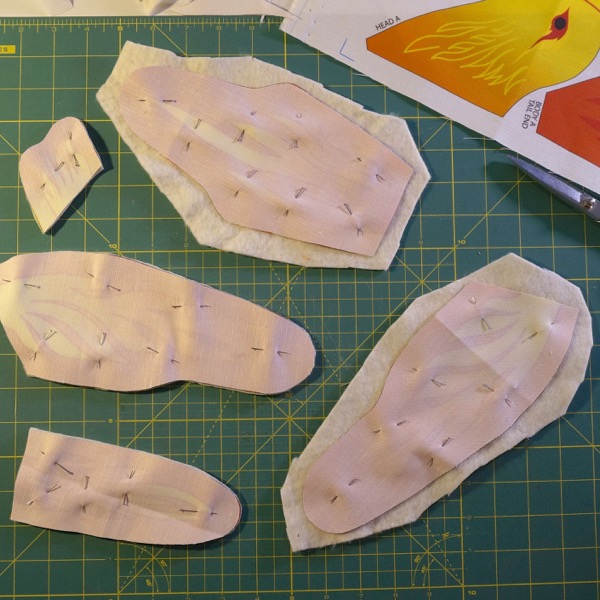
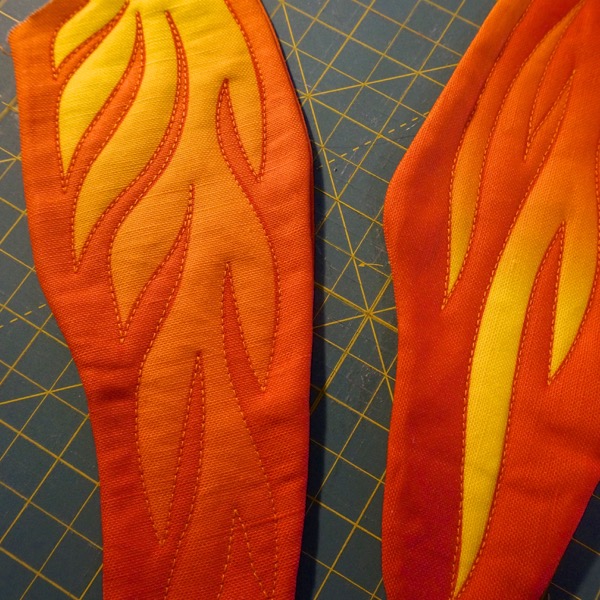
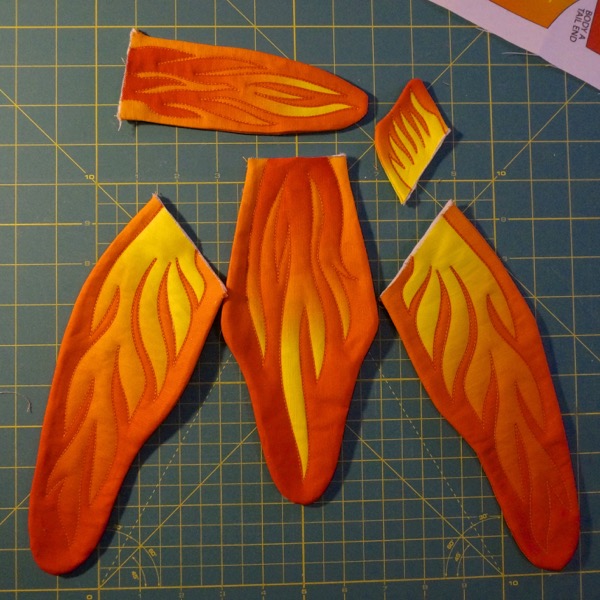
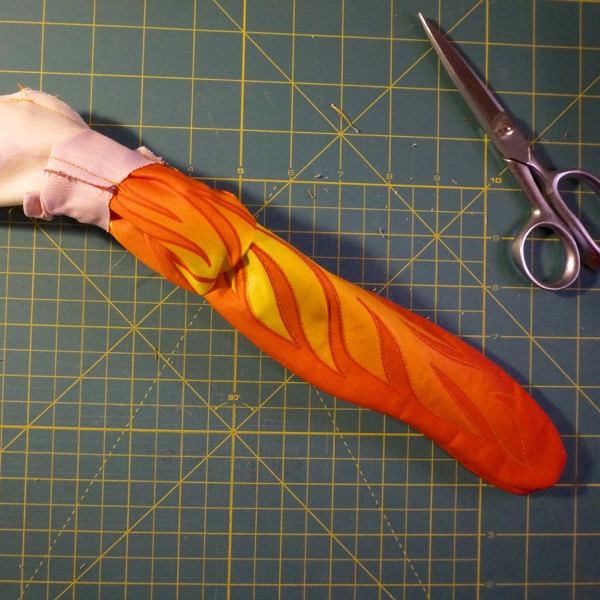
1] Create wings, head crest and tail pieces.
-
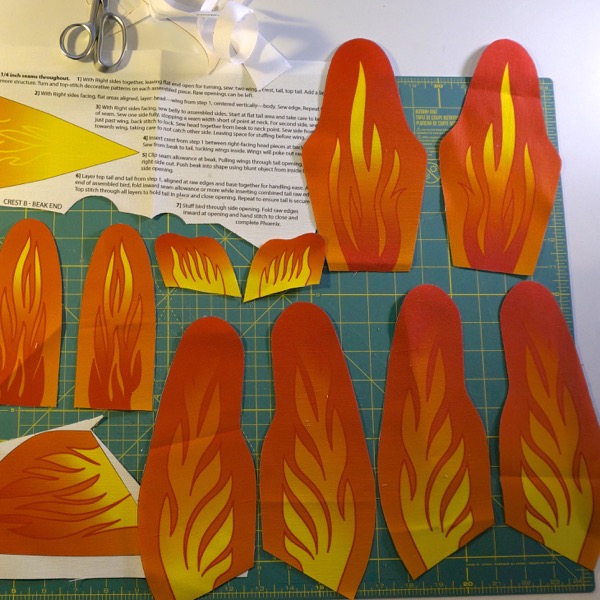
- Cut out pieces.
-
- Add quilt batting.
-
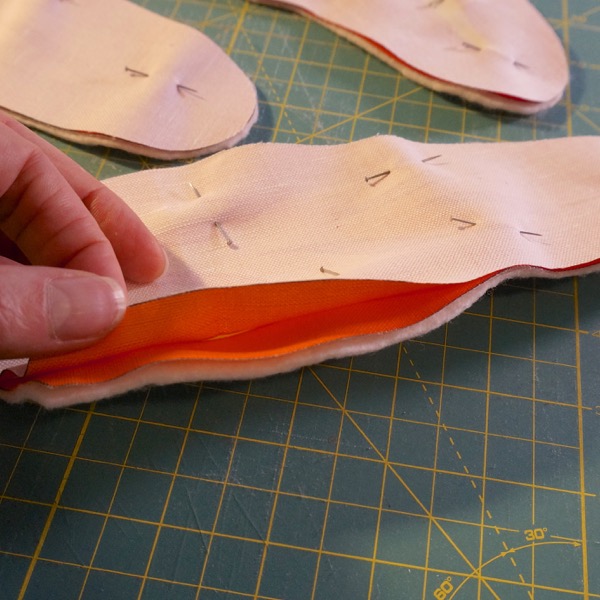
- Right (color art) sides together.
-
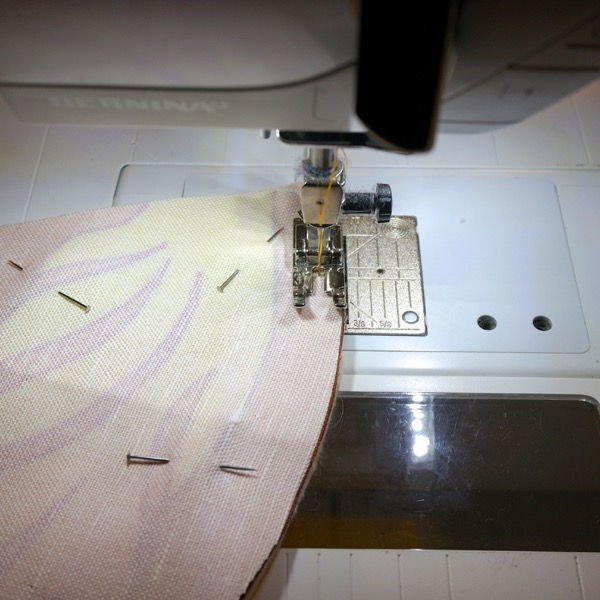
- Sew using scant 1/4 inch seam.
-
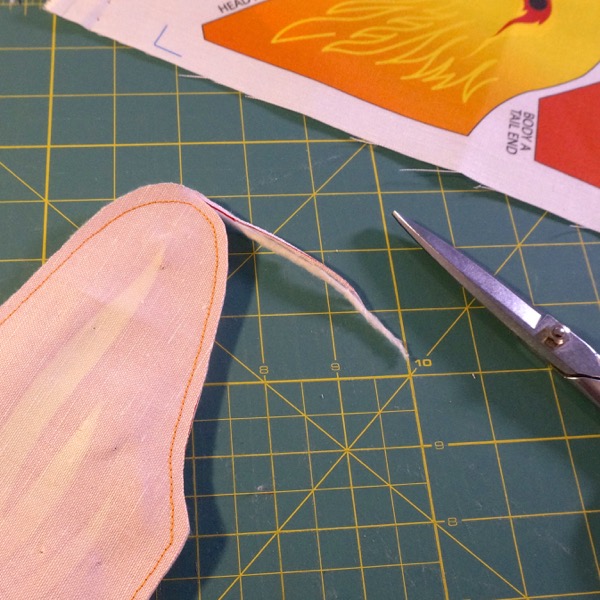
- Trim seam allowance.
-

- Turn right-side out.
-
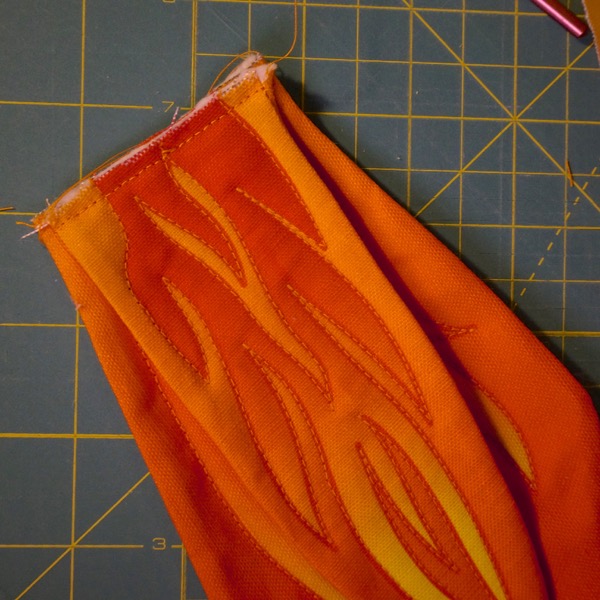
- Top stitch along artwork.
-
- Raw edges can be left.
Cut out: 4 wing pieces (WING A1 & B1 and WING A2 & B2), 2 crest pieces (CREST A & B), 2 tail pieces (TAIL A & B) and 2 top tail pieces (TOP TAIL A & B).
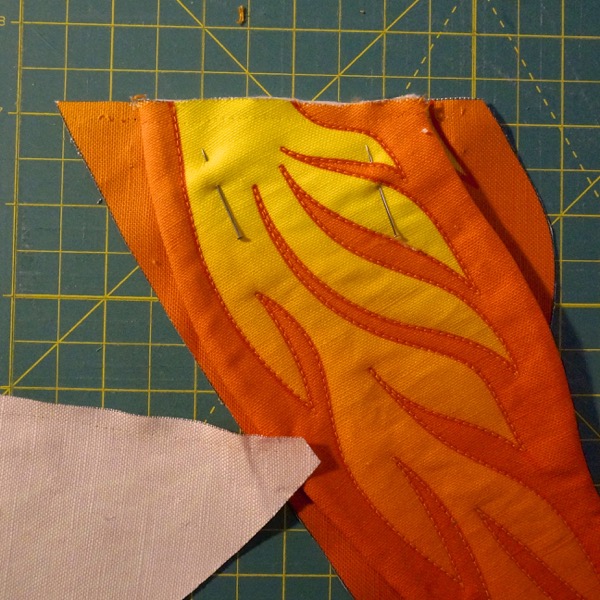
Recommended: Add a layer of quilt batting to wings, crest and both tail pieces for more structure. Pin through all layers before sewing.
Pin and sew: With Right sides together, leaving flat end open for turning, sew the two wings, crest, tail, top tail. If adding batting, sandwich on outside of two right-facing pieces.
Trim seam allowance through all layers to make turning easier.
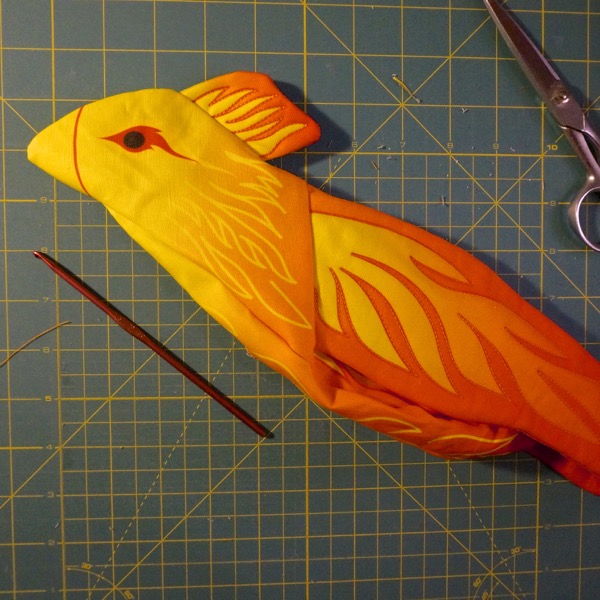
TIP: Use a blunt ended object, such as a crochet hook, to push edges fully out from the inside of turned pieces.
Turn and top-stitch decorative patterns on each assembled piece.
TIP: Set your needle to stop in the downward position so you can raise the pressure foot and turn the pieces without skipping stitches. Following the printed feather flame edges will accentuate the artwork, but you could also do your own top-stitch design.
Raw openings can be left as they will be hidden inside the Phoenix when fully assembled.
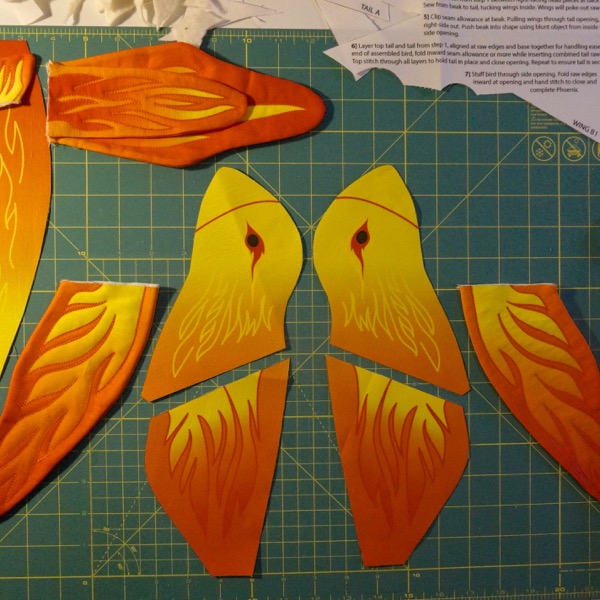
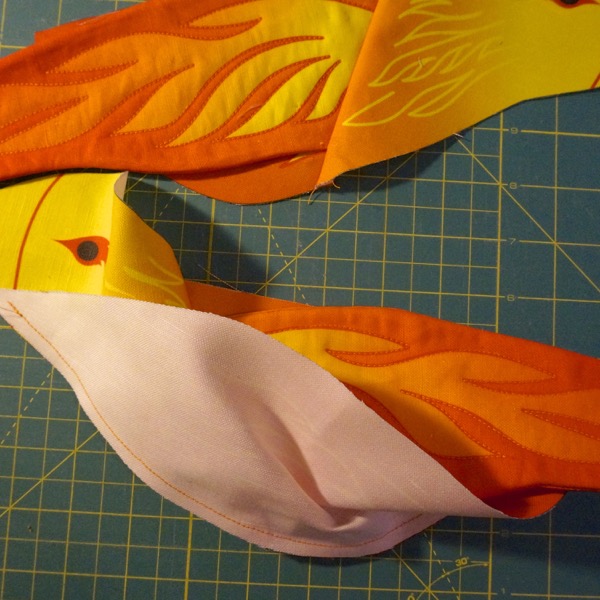
2] Assemble sides of Phoenix.
-
- Cut out head and body pieces.
-
- Line up wing on body.
-
- Pin wing to body.
-
- Layer head piece.
-
- Sew head to body with wing in seam.
-
- Sides with wings.
Cut out: 2 head pieces (HEAD A & B), 2 body pieces (BODY A & B).
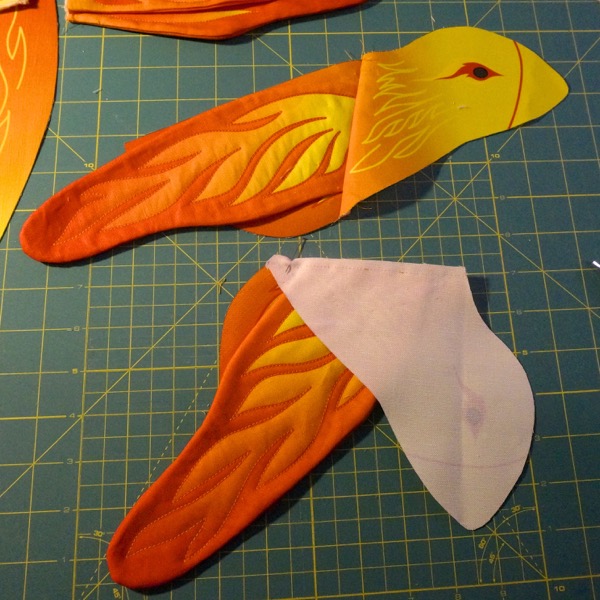
You will assemble each side of the Phoenix in the same manner.
TIP: Lay out matching head and body pieces so as to avoid confusion when assembling.
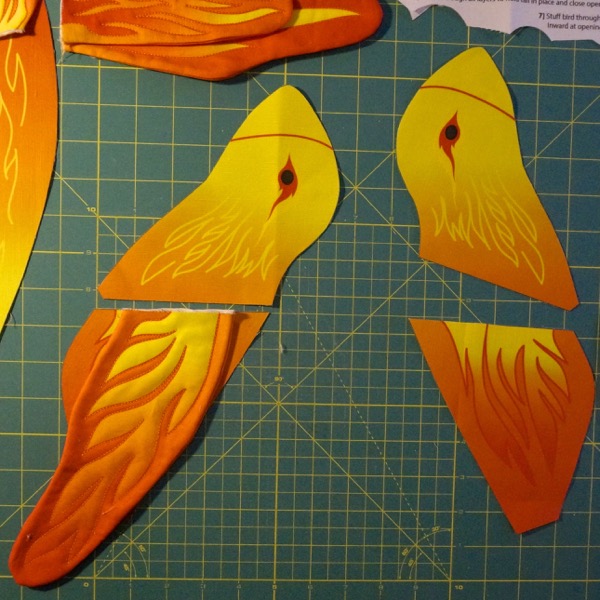
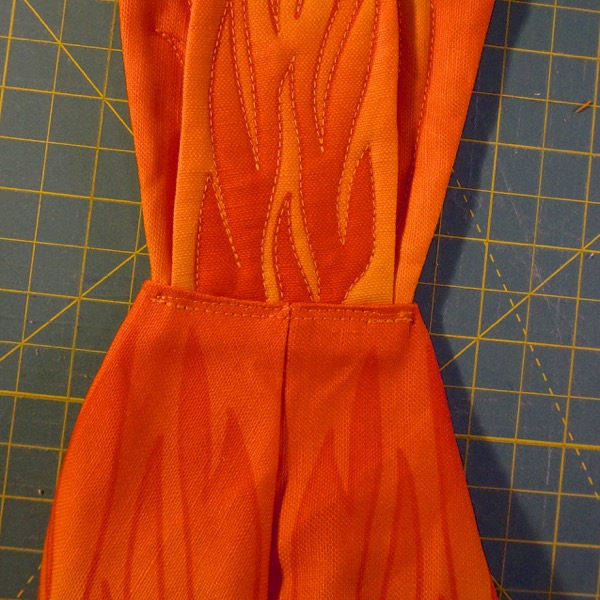
Line up assembled wing on body, matching raw edge of wing with flat edge of body, centered vertically. Wing shape should be sweeping down from back as shown in above images.
Pin wing to body.
TIP: Place pins far enough back that you will not be catching them in the seam.
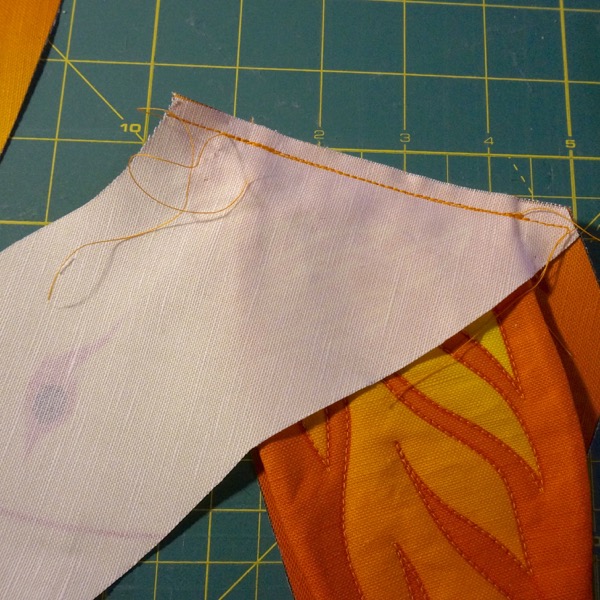
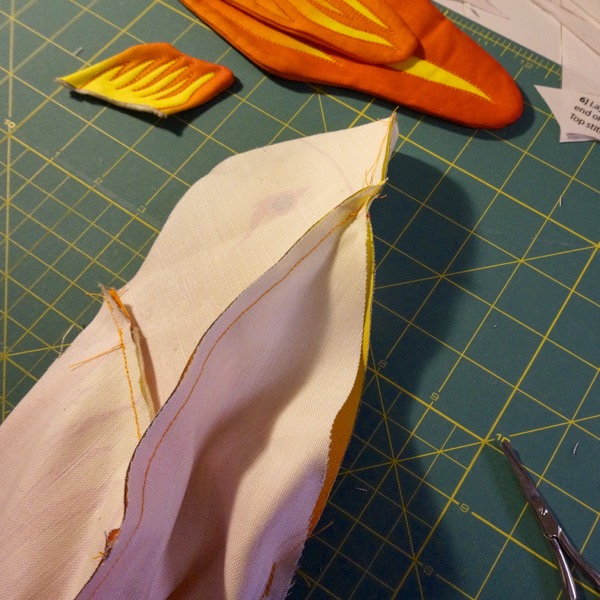
Layer, with right sides facing and flat areas aligned, the appropriate head piece for the side you are working on and sew all layers together.
TIP: Pin head to body only at one end. Sew starting at that end. Keeping edges aligned, ease over the step up to thicker wing included area of seam. Keep checking that edges are aligned as you ease across and down the other side of wing to join head to body. Again, I recommend using the down needle option as a way to stop and check position without skipping stitches.
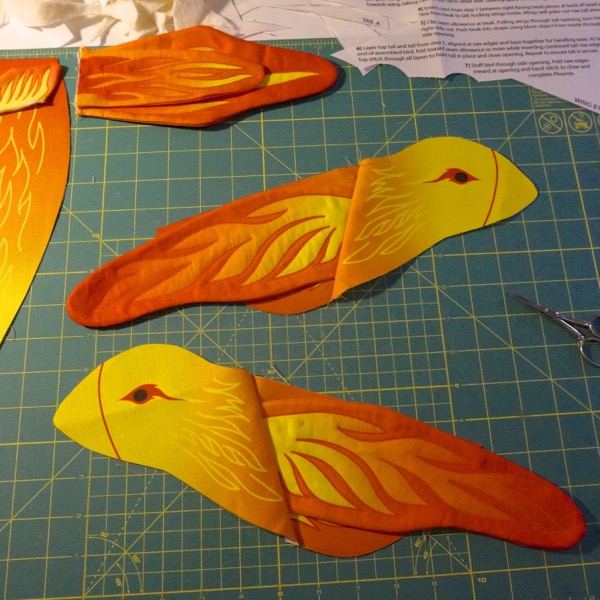
Both sides are completed in the same manner resulting in two assembled sides of head-wing-body.
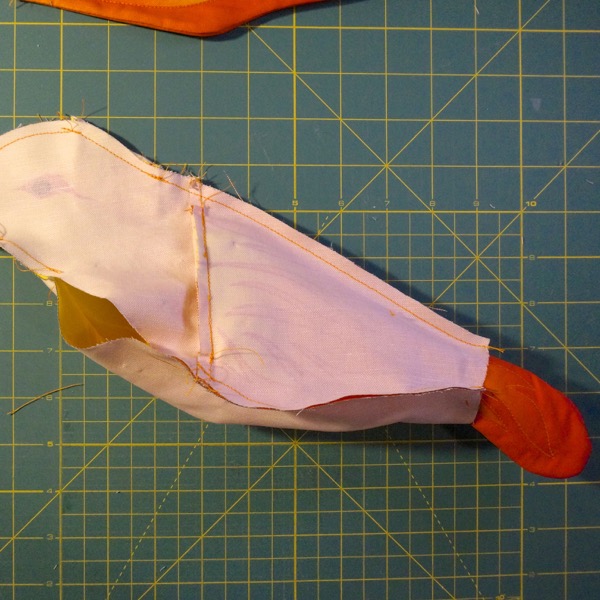
3] Sew sides, neck and belly together.
-
- Sew belly to completed side stopping before neck point.
-
- Sew beak to neck.
-

- Complete neck to belly seam.
Cut out: BELLY
With Right sides facing, sew belly to assembled sides. Start at flat tail area and take care to keep wing out of seam.
TIP: Sew one side fully, stopping a seam width short of point at neck.
For second side, sew from tail to just past wing, back stitch to lock.
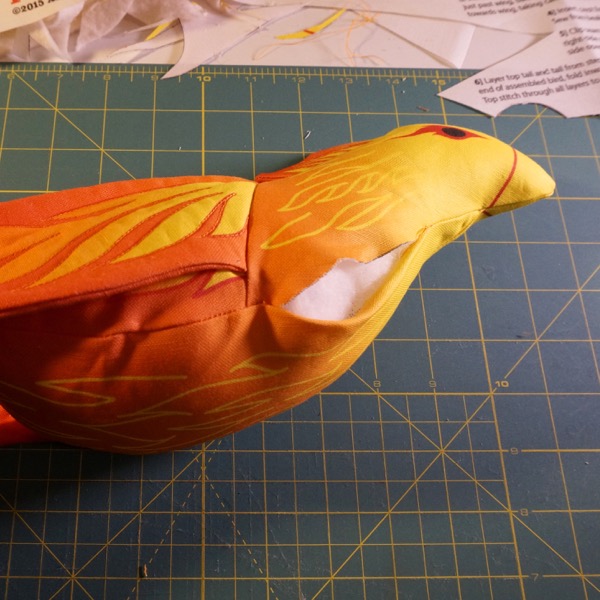
Sew head together from beak to neck point.
Sew second side from neck point towards wing, taking care to not catch other side. Leaving space for stuffing before wing. (Alternatively, you could leave this stuffing opening closer to the tail end of the Phoenix. I do recommend that either way you sew the wing securely in place. I also recommend that you sew at least 1 inch up the side from the tail.)
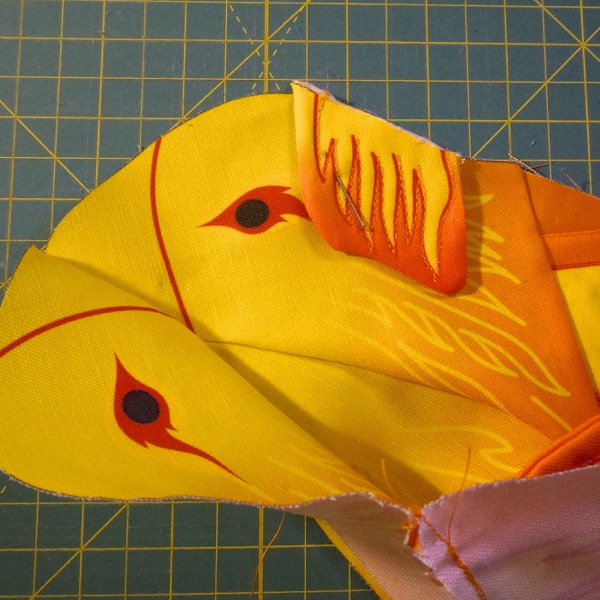
4] Add crest and sew back of Phoenix.
-
- Pin crest to back section of head.
-
- Sew beak to tail along back.
Insert completed crest between right-facing head pieces at back of head area. Angle as shown so crest will sweep backward on finished Phoenix.
TIP: Pin crest to one side of head making sure pin is not within seam area.
Sew from beak to tail including crest. Tuck wings inside as you go. Wings will poke out raw tail area.
TIP: As when assembling the sides, ease over the added thickness of the crest in the head seam, stopping to check edges are aligned at you go.
5] Turn Phoenix right-side out and shape beak.
-
- Pull tail to turn Phoenix.
-
- Push beak into shape.
Clip seam allowance at beak.
Pulling wings through tail opening, turn bird right-side out.
Push beak into shape using blunt object from inside through side opening.
6] Add tail.
-
- Baste top tail and tail together.
-
- Trim as needed to insert tail into body.
-
- Top stitch to attach tail.
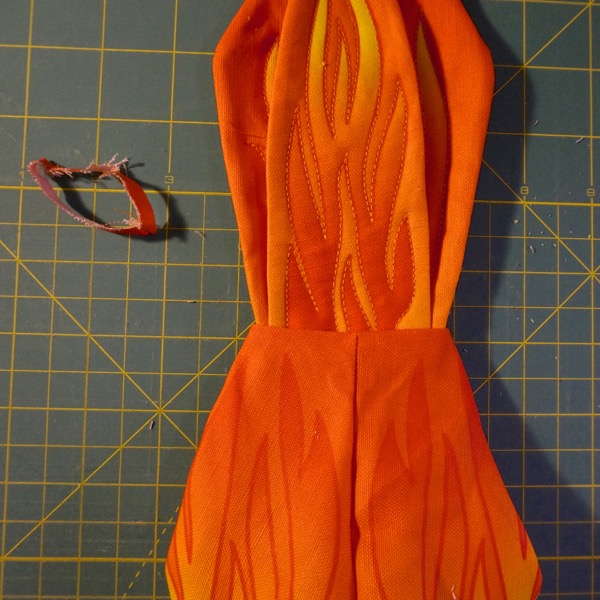
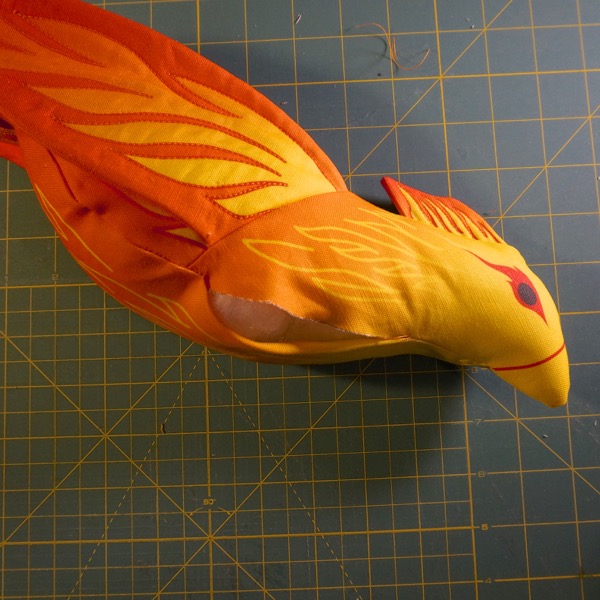
Layer assembled top tail and tail, aligning raw edges and base together for handling ease.
At tail end of assembled bird, fold inward seam allowance or more while inserting combined tail raw edge.
TIP: Trim off tail end of assembled body of Phoenix until tail fits without bunching. It should be snug, but not folded. Ensure that a minimum of 1/4 inch of body raw edge is folded inward.
Top stitch through all layers to hold tail in place and close opening.
TIP: Repeat to ensure tail is secure.
7] Stuff Phoenix and sew up opening.
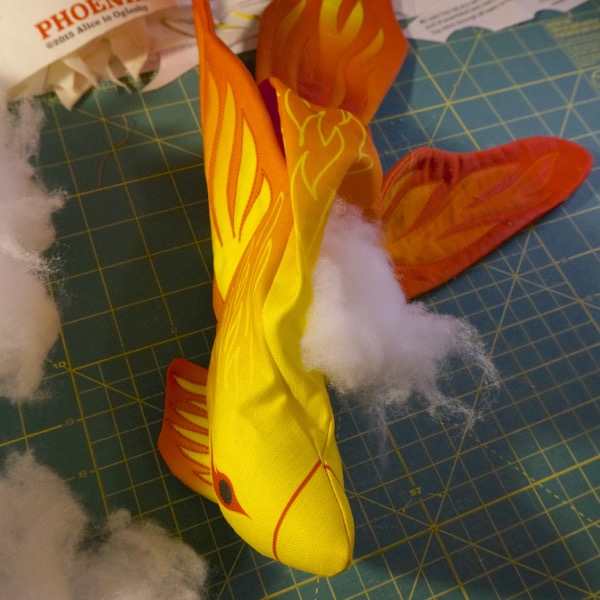
Stuff Phoenix through side opening.
TIP: Pack stuffing in tightly, especially in beak area. Stuff each end, then fill out the middle area.
Fold raw edges inward at opening and hand stitch to close and complete Phoenix.
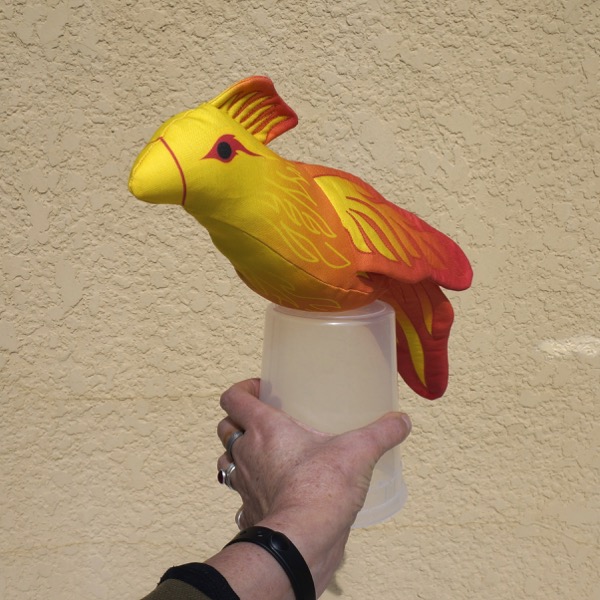
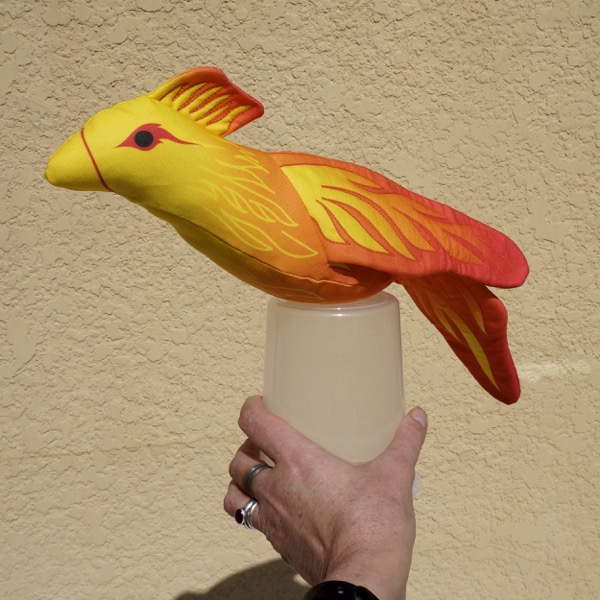
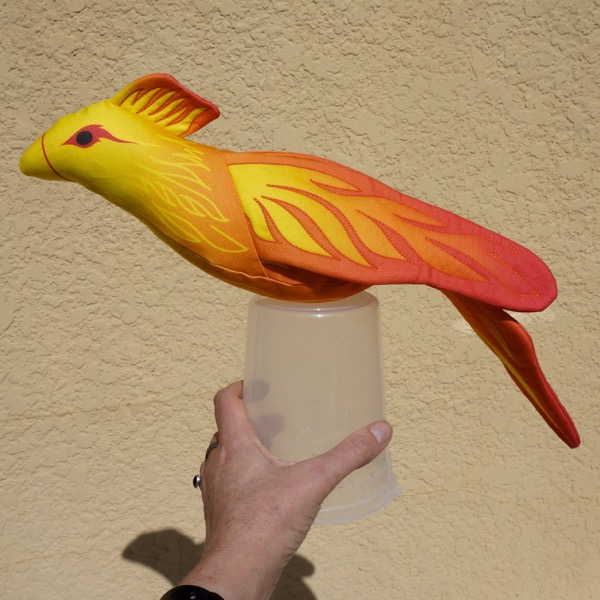
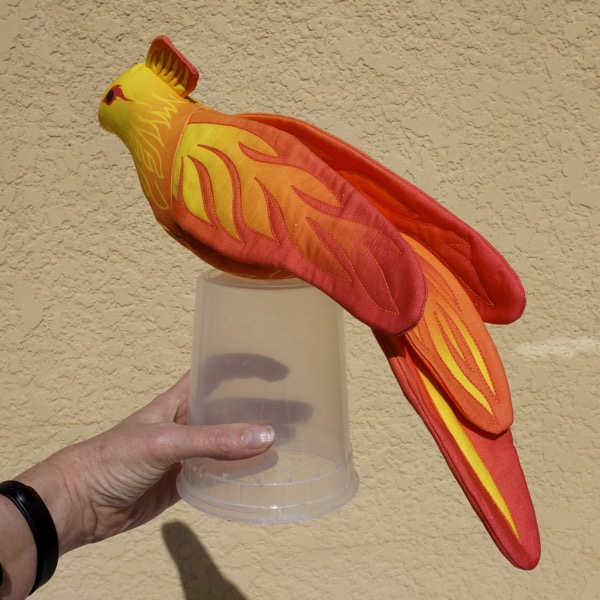
That is it, you are done1 Now you have a wonderful stuffed companion to sit on top of your sewing machine, or you could suspend it by its wings to fly over your work table.